Creating a WordPress website can seem daunting, but with the right guidance, it can be accomplished in just a few minutes. In this tutorial, we will walk you through five essential steps to set up your website using Hostinger. From obtaining hosting and a domain to customizing your site, we will cover everything you need to know to get started.
Step 1: Get a Hosting & Domain
The first step in creating your website is to secure hosting and a domain name. Hosting is where your website’s data is stored, including themes, plugins, and media files. A domain is your website’s address, like www.createdynamicwebsites.com.
To get started, visit Hostinger’s website. For beginners, it’s advisable to choose the Premium Web Hosting plan because it offers a free domain for one year and a lifetime SSL certificate. This plan allows you to create up to 100 websites with a storage capacity of 100 GB SSD.

Once you select your plan, click on Add to Cart. You can choose the payment period; opting for 48 months gives you a significant discount of up to 75% write this Code “1LAMINE44“. After selecting your plan, create an account by entering your email or logging in through Facebook or Google.
Next, complete your payment using one of the available methods. You will then receive a verification email from Hostinger. Be sure to check your inbox and verify your account.
Step 2: Install WordPress
After securing your hosting and domain, the next step is to install WordPress. Go to the Hostinger dashboard and click on Manage next to your hosting package. Scroll down to find the Auto Installer option.

Select WordPress from the list of content management systems. You will then need to enter a username, password, and email, in addition to giving your website a title. Click on Install to begin the installation process.
After a few moments, WordPress will be successfully installed. To access your website’s dashboard, enter your domain name followed by /wp-admin. If you don’t see the login page immediately, it may take some time for the domain to propagate, which can take up to 24 hours but typically resolves within an hour.
Step 3: Install A New Theme
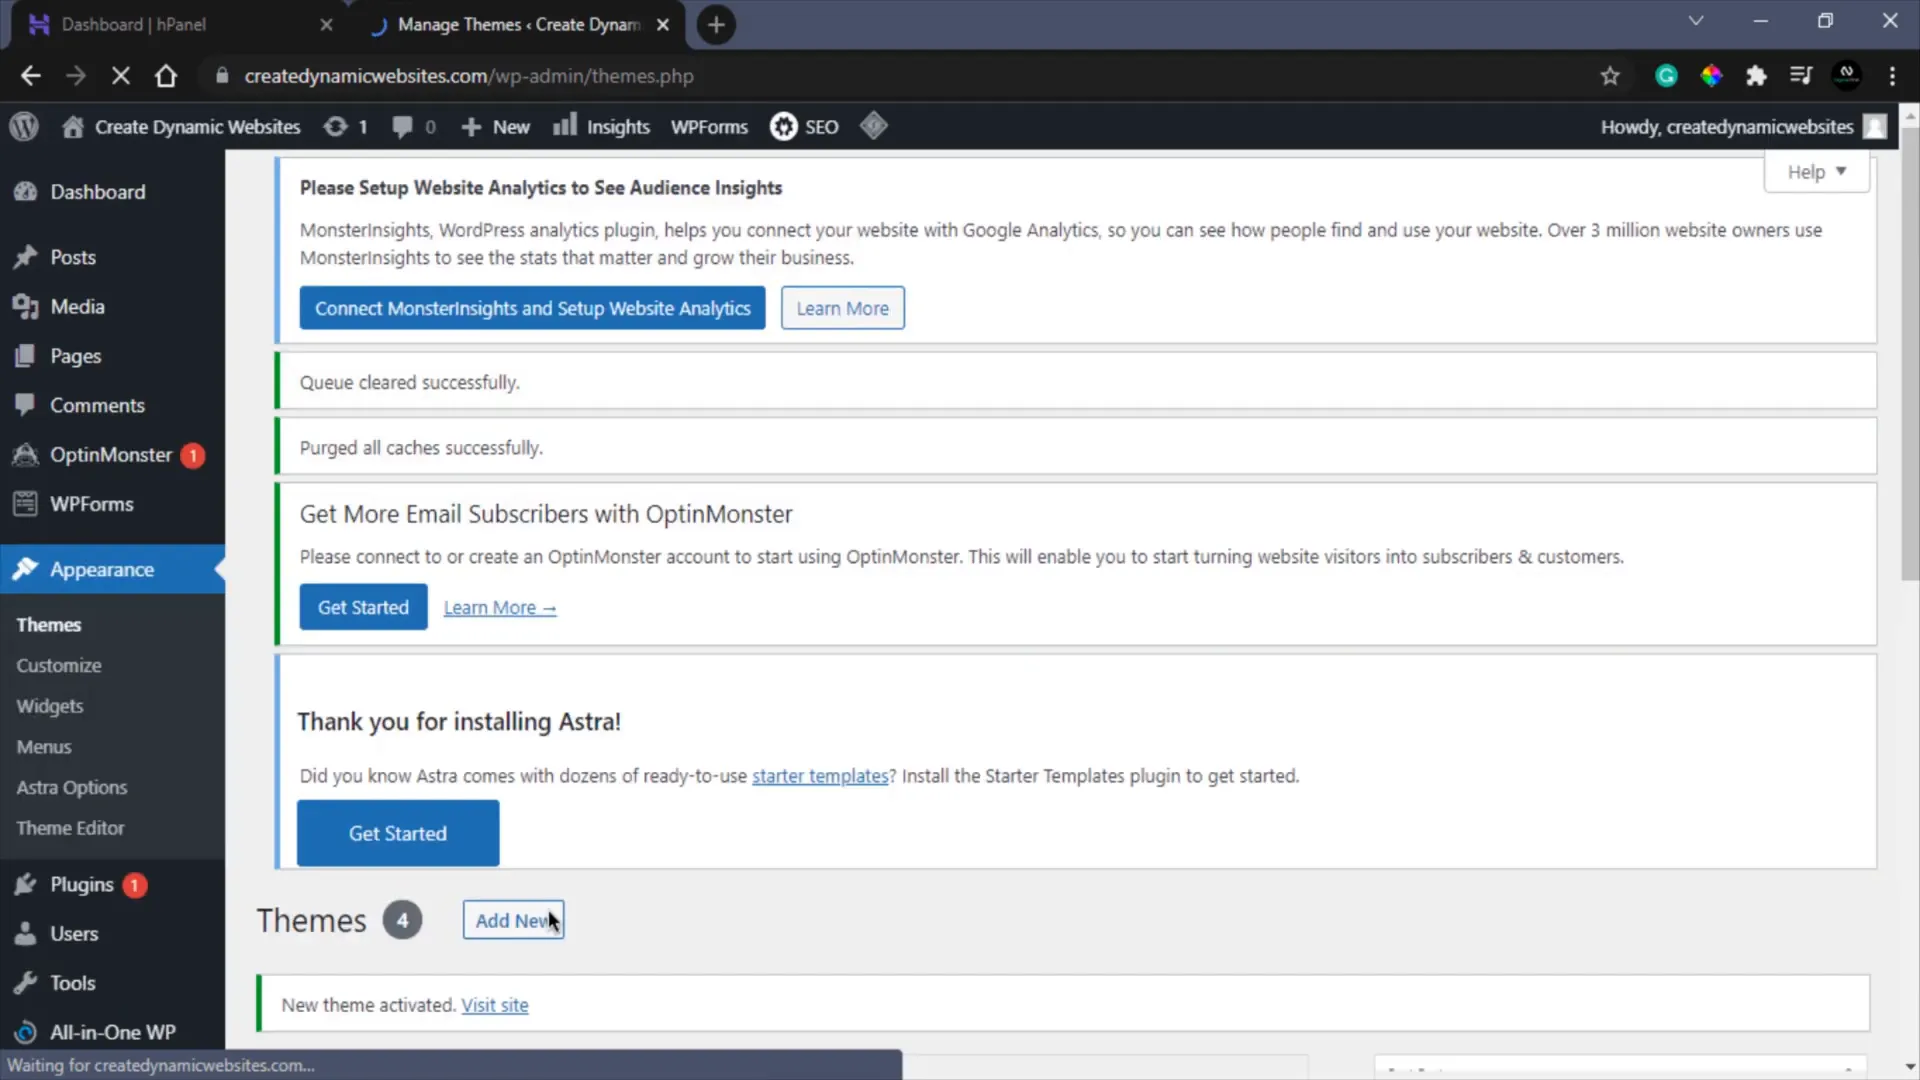
With WordPress installed, it’s time to choose a theme. A good theme sets the foundation for your website’s design. We will use the Astra theme for this tutorial. Navigate to the Appearance tab, then click on Themes. Click on Add New and search for Astra.

Once you find it, click Install and then Activate to set it as your active theme.
Step 4: Install Plugins
To enhance your website’s functionality, you will need to install some plugins. Go to the Plugins section and click Add New. Search for Starter Templates and install it. This plugin provides a variety of templates to help you get started.

After installing, activate the plugin and navigate to Appearance and select Starter Templates. Here, you can choose a page builder; we will use Elementor. You will see a plethora of templates to choose from. To view only free options, click on Free.
Once you find a template you like, click on Import Complete Site to import it into your WordPress site. After a brief import process, your website will be ready to customize.
Step 5: Customize Your Theme
The final step is to customize your theme to match your vision. Navigate to the page you want to edit and click on Edit with Elementor. This will open the Elementor editing interface where you can make various changes.

To change text, simply click on the text element and edit it directly. You can also modify colors, sizes, and fonts by navigating to the Style tab. If you wish to change button text, click on the button and make your edits.
For background images, click on the six dots of the section you want to modify, go to Style, and upload a new image or choose one from Pixabay.
Once you’re satisfied with the changes, click Save to apply them. You can similarly customize other sections of your site. If you want to edit the header or footer, click on Customize in the top menu.
Congratulations! You have successfully created a WordPress website using Hostinger. If you have any questions or need further assistance.
Keep learning and sharing your knowledge. Happy website building!


